Saturday, March 31, 2012

Parchment Paper & Banana Bread Muffins


It's easy enough to purchase cupcake papers, but what about those larger muffin tins? I love parchment paper--I buy it by the box at Costco, 12"X12", 1000 sheets.


Cut parchment into 6" squares....


Spray backside lightly with water to help shape into muffin tins.


After they are formed in the pan, you can put them into your pre-heating oven for a couple of minutes to help set the form and dry up the paper.


Ingredients:
Bowl #1
3 or 4 mashed bananas
1/4 Cup Almond Milk
1 teaspoon vanilla
Bowl #2
2 1/2 Cups Flour
1 teaspoon baking soda
1/2 teaspoon salt
2 Tablespoons ground flax
Bowl # 3
1 1/4 Cup Sucanant
1/2 Cup Coconut Oil


The chocolate chips, medjool dates and soaked pecans are optional, but if you've got them, why leave them out?


Blend everything together and....


You can spray the paper cups with PAM or olive oil if you like, then fill parchment paper lined muffin tins with batter and bake in preheated 325 degree oven for about 45 minutes, maybe a little more if needed.
Make sure you have some chilled almond milk to go with these wonderful muffins.
I love that even the large muffin tin pans can produce paper lined goodies!

Monday, March 26, 2012

PAPER

A little while ago one of my kids said "Guess what, I know what paper is made from.....TREES!!!" He inspired me with his excitement! And he inspired this weeks topic. Have fun!

Sunday, March 25, 2012

Sun-Dried Tomatoes--One Ingredient!

You can store in olive oil, or like I did, just store dry in the jar.


Slice tomatoes 1/4 inch thick, or so.


Place on food dryer sheets that have been sprayed with olive oil or PAM.


Dehydrate at 135 degrees for about 12 hours or so, as you like it.


Don't they look pretty next to my mint? They are great on sandwiches, pitas, ground up in hummus--basically, anywhere you would use fresh tomatoes, sun-dried tomatoes give a more pungent flavor. 

Simple Snack, Little Effort


This is a simple snack and uses very little effort and John and I love it. (sometimes it's a meal)

Almond Milk--One Ingredient!


That's one ingredient if you don't count the water!

Soak almonds for 24 to 48 hours, rinsing a few times in between to keep the water fresh. I soak whatever I want and freeze the soaked almonds I don't use. Then when I want to make almond milk again, I have no wait time--it's done in 5 minutes! Faster than running to the store!


After almonds are soaked, rinse and measure out one cup. This will make two quarts of almond milk!


Add water (I always use distilled or purified) up to the 4 Cup line and...


Blend on high for a couple of minutes--amazing how it all of a sudden looks like milk!


Using a white men's cotton handkerchief, or muslin bag to strain with, pour blended liquid into a wide-mouth measuring cup or bowl.


Gather up the ends and squeeze the liquid through the cotton fabric. (I don't know why I haven't made a bag yet--like it would be so difficult!)


Squeeze with both hands (rather tricky with one hand holding the camera) until just the pulp is left.


Shake the pulp back into the blender and add 4 more cups of water.


Blend again, and repeat the straining process with the cotton handkerchief or bag.


Save this last pulp for your next batch of cookies or bread--tastes good and you're not wasting any nutrients!

Makes two full quarts of almond milk. It is totally wonderful as is, but if you want to sweeten it with agave and add vanilla, go for it. A 1/4 teaspoon salt is OK. You can also add 1/4 teaspoon of xanthan gum to keep it from separating--it also makes it a little creamier, like chocolate milk. (If it separates, no worries, it's not gone bad--just shake it up. That's why when you buy it ready made, you can't see through the container!)

Serious Chocolate Nutrition

I dedicate this recipe to Heidi and Mom who were there in the kitchen while I was needing some "serious chocolate nutrition" and fast. It turned out to be a hit!
1 extra large handful of fresh spinach
2 sprigs (about 1/4 c.) parsley
4 dates pitted
1/3 c. cashews (I soak mine for at least an hour)
1 T. almond butter ( you can use peanut butter)
1/4 c. maple syrup/agave- or honey
3 heaping T. cocoa powder
about 2 c. water (play with consistency)
about 2 - 3 c. ice (play with consistency)

Put it all together and blend until smooth. It may take a bit, but, just keep blending!
This recipe may not seem simple, but, when you have all the ingredients most of the time on hand and a bag of cashews already soaked, rinsed and frozen in the freeezer- this recipe flies and you have your chocolate nutrition fix fast!
I hope you enjoy it as much as we did! Chocolate has been the best relaxant in our family. Mom still keeps a big container of chocolate chips stashed away in her house. (As if it was a staple, wait a minute, it is. And, I think she needs to go shopping for more. Between Heidi and me, I think we cleaned her out. )
"Child Tested, Mother Approved"


Saturday, March 24, 2012

Super Simple Glass Magnets

Ok so I really went for simple! These magnets are really easy! All you need is:

Jumbo Melted Glass Marbles-You can find them at any craft store, dollar store or moms garage!
Stickers- (mom's garage)
Glue Gun-loaded with glue (under moms sink)
magnets- (magically in moms hand right when I needed them)


All ya do is put some stickers on the marbles, then glue on the magnets. 10 minutes then you're done!


Lisa- Since you put up a picture of moms unfinished quilt I felt I just had to put up one of it completed...with a sweet little Clover fairy of course!

Little Lost Puppy in a Flower Garden

I tried for simplicity, but have too much stuff to do.  So I went the opposite direction.  My thought process is really backwards.  The girls have a birthday party to go to tomorrow.  My opposite version of simplicity here is not quickly buying a gift but using stuff I already have to make something by hand.  Of course, it takes a whole lot longer, but I just love making stuff.  So here is project one for the week:

Polka Dot Puppy

I fell in love with this fabulous book by Jennifer Paganelli called Girl's World.  I just love it.  The fabrics are so great and the dresses are adorable.  And then there is this sweet little puppy toward the end of the book.  It was love at first sight and it was the first pattern that I traced.

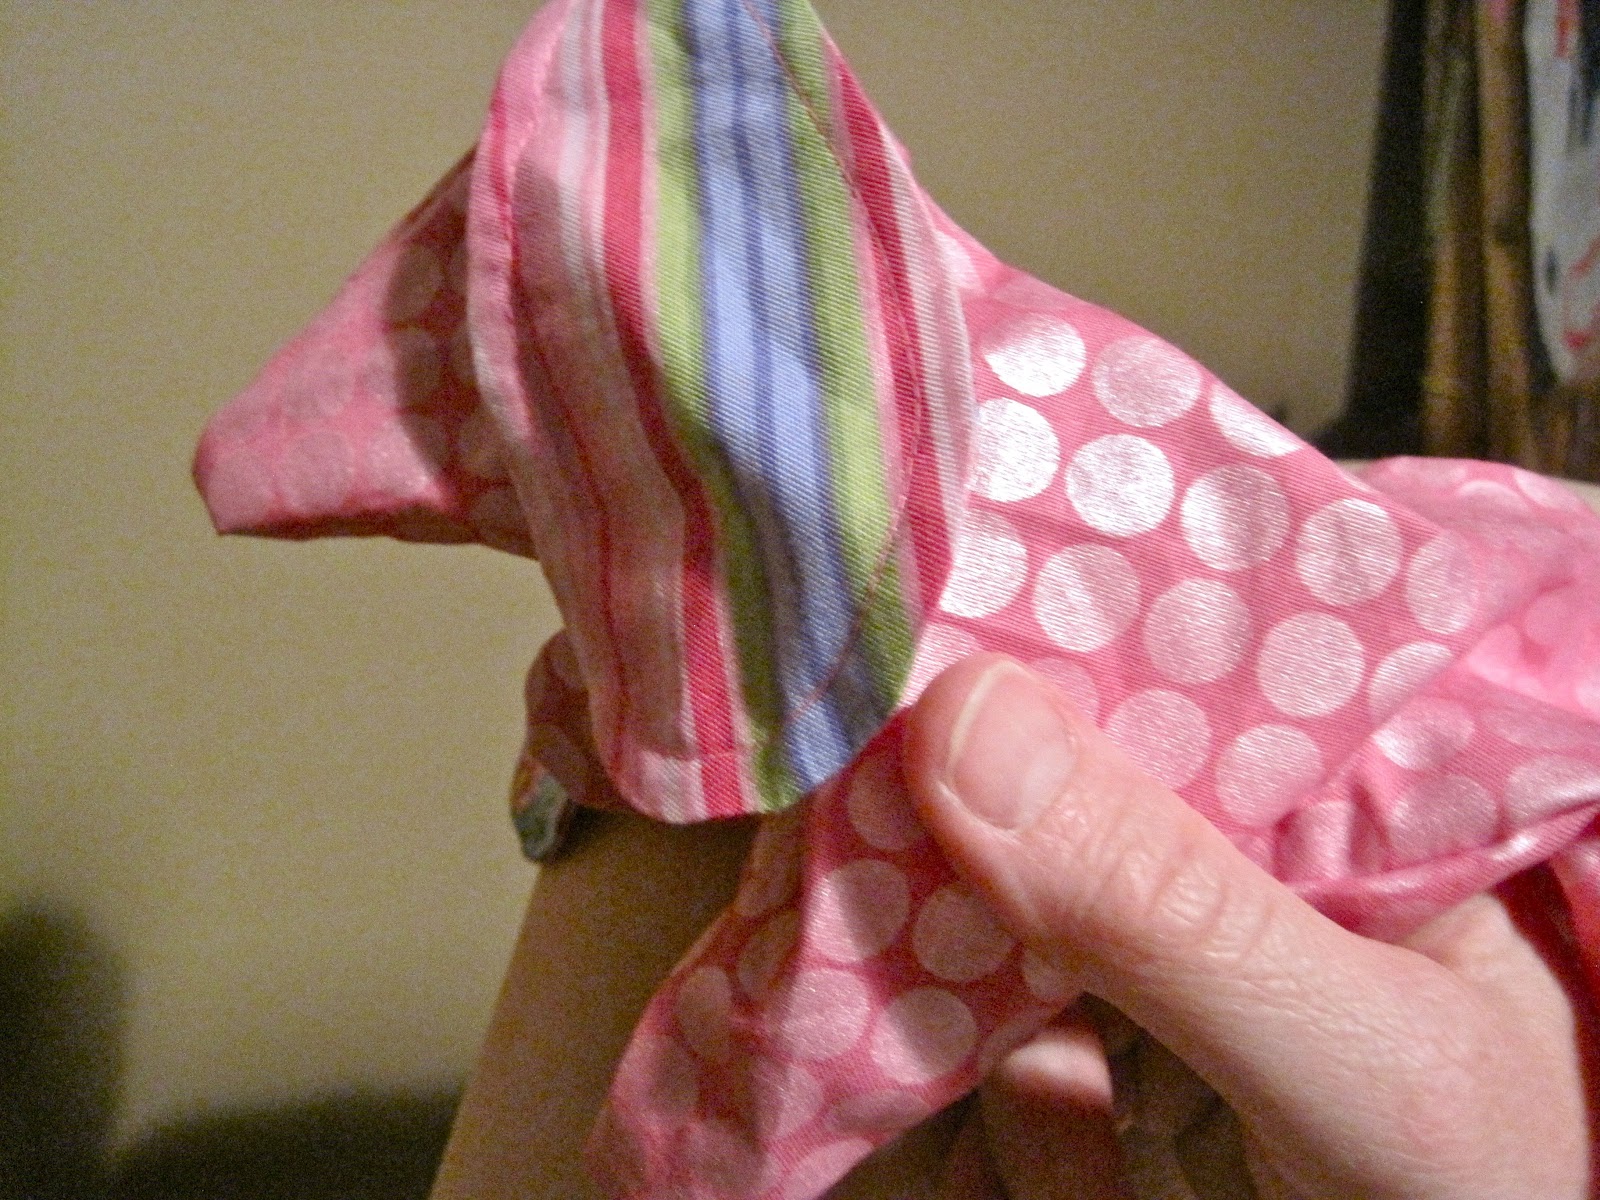
 I rummaged through my fabric bins and found this great fabric with shimmery pink polka dots on a bright pink background.  I also found a coordinating shimmery stripe and a pretty little floral print.
 Here he is, unstuffed.  He's cute in a homely sort of way.  At this point I still had not discovered the horrible deformity that I had created in his legs.  I altered the original pattern a bit so instead of a two-dimensional flat puppy with only two legs, he could have all four legs and might possibly stand on his own.  Unfortunately, my alteration gave him a horribly saggy bum.  The party is only 12 hours away.  I have work to do tonight.


I've started sewing tags into my creations.  I think it gives a nice professional touch.  Do you like the name?

I made these tags with a sheet of ink-jet-printable fabric.  It's so easy and looks so great!

I'll show you the final version when I get him done.  Maybe I'll include a tutorial if I can figure out how to fix his bum.


We are going to a baby shower in two weeks.  It's really not like me to start a project so far in advance. But I was really excited about doing it.  So instead of finishing the puppy today, I made a quilt.  I have problems with prioritizing.

Baby's Flower Garden Quilt
I was inspired by the quilt that mom made for little Clover.  That quilt is amazing.   I went for a simpler version that I could hopefully complete in time.  Here's a photo I have of Clover's quilt-in-progress:

Mine will also have a white border around the flower squares and then I will further plagiarize mom's quilt by binding it in strips of floral fabric.  Imitation is the sincerest form of flattery.  I love you, Mom!

Monday, March 19, 2012

Simply Wonderful

Simplicity is Greatness in Goodness
Sri Chinmoy
Let's see what amazingness we can make this week using the least effort/ or ingredients possible. Then, go relax in the tub,  enjoy taking a walk with your family, or read a great book! Love y'all! and look forward to your posts! 

Sunday, March 18, 2012

Raw Oatmeal Chocolate Chip Cookies

This is a cookie dough cookie that I enjoy making for my kids and their friends. Today I made them for my wonderful nephews and my darling children. It's usually really easy, but I ran into some problems. I just happen to be visiting mom and her food processor was not working when I made these, so her Vitamix came in handy. I had to add a little water to help it mix, but, it still turned out great!


1 c. pitted dates
1 c. soaked almonds rinsed
1/2 c. soaked cashews 
3/4 c. oatmeal flakes
1 t. vanilla
dash of salt
1T. coconut oil 
1/2 c. vegan chocolate chips
a little agave/ honey/ or maple syrup to taste if desired
water if needed to help in mixing

First mix in a food processor/or high powered blender the nuts and dates until smooth. Add the rest of the ingredients and pulse until completely distributed. Place dough on a sheet of plastic wrap and press it into a large rectangle about 1/2 to 1 inch thick. Then cover with another plastic wrap and set it in the freezer for about 1 hour or until desired firmness. (Sometimes the cookie dough goes right from the bowl into spoons for all the kids)! Cut into blocks and serve, or use a cookie cutter and reshape the remainder of the dough. Enjoy!


St. Patty's Gingerbread Cookies


These cookies are a variation of Rene's Gingerbread Cookies--basically, I just used arrowroot instead of eggs, almond milk instead of cow milk, and sucanat instead of white or brown sugar--and of course, they're GREEN!

Ingredients:
2 Cups Sucanat (or a combination of white & brown sugar)
1 1/2 cup oil (margarine, butter, coconut oil, or whatever)
1/4 Cup Arrowroot, mixed in...
1 Cup Almond Milk
1 Cup Honey & Molasses (mostly honey)
1 Tablespoon Ground Ginger
1/2 or 1 teaspoon Cinnamon Oil
2 Tablespoons Baking Powder
2 teaspoons Salt
8 or 9 Cups Flour, as needed


Mix all ingredients in your Kitchen Aid or with a sturdy wooden spoon until blended. Put in a zip lock bag and refrigerate overnight or a couple of hours--whatever works.

If it's St. Patrick's Day, use a shamrock cookie cutter and place on parchment. Preheat oven to 350 degrees and bake for 10 minutes. Frost with a drizzle of green frosting--powdered sugar, water, food coloring, and a dollop of clear Karo syrup. The syrup gives the frosting a glossy seal.
Then, just finish frosting as the grandkids arrive at midnight from their 18 hour road trip!


Saturday, March 17, 2012

Raw Whole Wheat Berry Bread


This was such a great find for me! I wish I could remember how and where I found the recipe online.  I have been looking for literally years to find a bread that met certain criteria for me. This bread is simple and hearty. This has more of a pita bread consistency, but raw. It is moist, dense, and sweet. The criteria I was looking for in a bread was something that was cooked at a low temperature (less than 120 degrees), so that if I was to plant it after it was already prepared, it would grow in the ground. Eating foods that are "alive" contain more nutrition than those that have been cooked at hight temperatures. It changes their composition and looses the nutritional value. Sprouts verses seeds are very different in their makeup. Sprouts contain so much more nutrition than just it's seed.   I wanted to use wheat. It is so satisfying to me when prepared properly. I didn't want to use flour.  I wanted to sprout and "cook" the grain before it was ground up. And lastly, I didn't want to add yeast. Yeast tends to wreak havoc in my body. So, here it is! 
4 c. soaked, sprouted and low heated wheat berries
1/2 c. dates
1/4 c. yellow raisins 
(you can use brown too, but, I like the yellow)
1/2 t. salt
1c. water 
First, you'll need to soak, sprout, and low heat the berries. I do that by soaking my wheat in the fridge over night. I put about 3 cups of wheat kernels into a large bowl with a clean water (purified, distilled, reverse osmosis). Overnight the berries expand. You then set them out on the counter near the sun light for the day and let them grow. You will want to rinse them atleast 3 times that day You could sprout them for a couple days if you choose. When you are done sprouting, then I put them in my crock pot on the warm setting and cook them through the night. I crack the lid just a bit to lower the temperature so they don't overcook. In the morning, drain the berries. Then,  place all the ingredients in a blender. I usually place the dates, raisins, salt, and water in the blender first and then the berries.  It helps to create an easier movement of the blender blades. If you need to add a little more water, go ahead. I like some of the wheat berries to remain whole. But, I have blended it all up to a very smooth texture as well. Both are great! After it is blended, you will need to place it on a dehydrator sheet. Now, if you don't own a dehydrator sheet, you could still try this. I would spread your mixture onto a sheet of cheese cloth that is laid out on top of a wooden cutting board. You will need to heat your oven to your oven's lowest setting (usually it's about 170) and then crack the door open to drop the temperature. If you have a dehydrator, set it at 145. You will spread the mixture over your fruit leather sheets or plastic pan or whatever you come up with from 1/2 inch thick or less. Dehydrate for 1 hour at 145. The food will not reach 145 in that first hour, but will help speed the process and prevent spoiling. Turn it down to  115 for 4 hours. After that, flip the bread and dehydrate another 2 hours or until desired softness. I like mine firm but moist. I know it's a lot of work, but, it's so worth it. It's something you prepare a little each  day. A little here, a little there. Then whalla! It's done! Try it! You can do it! And, my kids realllllly liked this! Emma said she likes it better than cooked bread. Let me know if you have questions or suggestions!


Coconut Macaroons Dipped in Chocolate


14 oz. sweetened coconut flakes
1 can (14 oz.) sweetened condensed milk
1 tsp. vanilla extract
3 large egg whites at room temperature
1/4 tsp. salt
Melted Chocolate for dipping

Adjust oven rack to center of oven.
Preheat oven to 325 degrees F.
Line cookie sheet with parchment paper. (You must not forget this step. It is most important.)

In large bowl combine coconut and condensed milk and vanilla until well blended.
In your mixer beat egg whites and salt on high speed until stiff peaks form.
Gently fold egg whites into the coconut mixture, being careful not to deflate the egg whites.
Drop the batter onto lined cookie sheet in about 1 - 2 tablespoon sized scoop. About 2 inches apart.
Bake for 22 - 28 minutes or until golden brown.
Remove from oven and let cool for a few minutes, then transfer to a cooling rack until cooled, then you can either eat them or dip them. I chose to dip them. If you choose to dip them, then dip them and place them on either parchment paper or foil and then let the chocolate harden.